
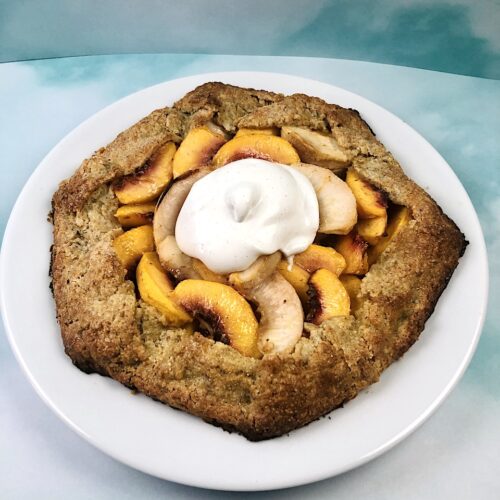
Rye Galette with Brown Butter Peaches
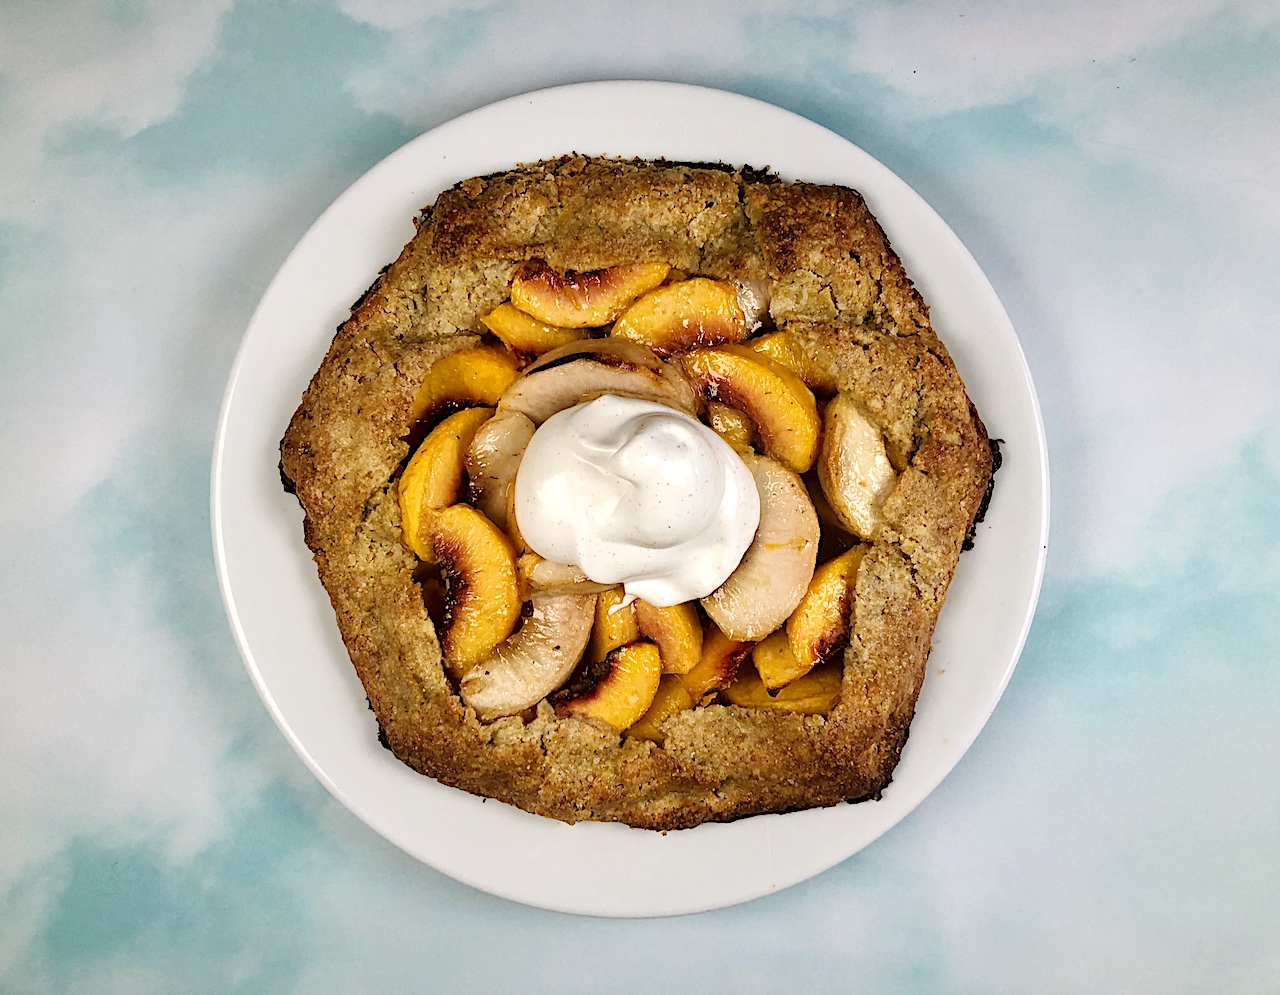
The beautiful thing about the galette is that its perfections lie in its imperfections. It’s supposed to look rustic, drip juices, and have a char or two or three. All of that somehow makes it taste better.
The rye crust is the real star of this dish, in my humble opinion. I could eat it alone, but it would be really strange if I offered guests pie crust with no pie…or would it? The fruit filling is also completely interchangeable, just swap it out in equal amounts (3 cups) and keep everything else the same! Feel like a mini version? Freeze the other half of the dough for up to 6 months! The Galette is truly versatile and ever-forgiving.
Rye Galette with Brown Butter Peaches Recipe
Ingredients
FOR THE CRUST!
- 1 cup all-purpose flour
- ⅓ cup rye flour
- 1 Tbsp sugar
- ½ tsp kosher salt
- 1 stick butter, cold, unsalted, divided into tablespoons
- 1 egg
- ½ pint heavy whipping cream
- ½ tsp water
- ½ tsp apple cider vinegar
- 1 tsp vodka
FOR THE FILLING!
- 2 Tbsp butter, unsalted
- 2 – 14.4 oz cans sliced peaches, no sugar added, drained
- 2 Tbsp sugar
- kosher salt, just a pinch
- ½ tsp lemon zest
- ¼ tsp pure vanilla extract
Instructions
FOR THE CRUST!
- Place flours, sugar, and salt in a food processor. Pulse until well combined.
- Add butter and pulse until it's roughly chickpea-size pieces, about 10 1-second pulses.
- Beat egg and pour into a ⅓ cup measuring cup. Add enough cream to get it to ⅓. Mix well and then pour into a ¼ cup measuring cup, reserving the rest. I know this sounds bat-shit crazy, but trust Mama. I got you.
- Add the ¼ cup egg/cream mixture to food processor along with water, vinegar, and vodka. Pulse until it resembles LARGE pieces of sand. Please don't over-pulse.
- Turn dough mixture onto a lightly floured surface. Compress it inward to form a blob of dough. Keep compressing and rotating à la Patrick Swayze and Demi Moore in Ghost. Start to flatten/compress/rotate to form a flat disk. Wrap in plastic wrap and set in fridge. Time to start the filling!
FOR THE FILLING!
- In a large pan over medium heat, melt butter and wait just until it starts to turn brown. Don't burn!
- Add peaches, coat with sugar and a pinch of salt. Toss to combine and cook for 3 minutes.
- Add lemon zest and vanilla and toss to coat. Taste here to see if it's sweet enough for you. If not, add some more sugar, Sugar!
- Turn up head and reduce any liquid to a thick syrup, then immediately transfer to a bowl and set in fridge until COMPLETELY cool, 1-2 hours.
- While that's chilling in the fridge, your dough should be cool enough to work with.
- Place disk on a floured surface and roll out to a roughly 11 inch diameter. If ends start to crack/split, simply cut and paste. Take a piece from somewhere else and roll it over the blemish. The dough is very forgiving. I like to then use a butter knife to cut out a smooth circle…I never said it was perfect 😉
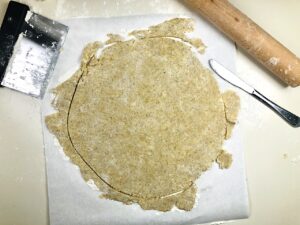
- Using a pastry scraper or flipper spatula, transfer crust to a large piece of parchment paper. Place on a baking sheet and store in fridge until your filling has completely cooled.
- When ready, remove crust and filling from fridge.
ASSEMBLY, BABY, YEAH!!!
- Spoon peaches onto crust, leaving behind any excess liquid. Leave about a 1-2 inch lip to fold over filling. Piling peaches in the center is totally fine.

- Start folding your dough over the filling to create a pleated pattern, meaning folds should overlap (refer to picture below). If dough is breaking easily, just leave out to warm a little and become more pliable. In this picture there is wayyy too much liquid. Don't be like this picture.

- Once pleating is complete, brush folded-over crust with remaining egg/cream wash. Sprinkle generously with white, granulated sugar and sparingly with salt.
- Slide the piece of parchment paper that's holding your galette onto a cooling rack, and set that cooling rack into your baking sheet. Set in the freezer for 15 minutes while you preheat your oven to 400°F.
- Remove from freezer and place baking sheet with cooling rack and galette (AKA EVERYTHING) onto the middle rack. Bake for 35-45 minutes or until crust is that perfect golden brown. Rotate halfway through bake. When your galette is 10 minutes away from being done, take it out of the oven, carefully remove parchment paper, and allow to finish the remainder of the bake on cooling rack .
- Remove from oven and allow to cool for 15 minutes on the cooling rack that it's already on. How convenient!
- Top with your favorite whip or ice cream and get horny from these gorgeous aromas.
Notes
Equipment:


The equipment section above contains affiliate links to products I recommend, many of which I love and use daily!